 I have been wanting to make these for such a long time! English muffins are I think are definitely a breakfast food or at least they primarily belong in that group of breakfast foods. Some people are into bagels, others crumpets or pikelets (mini pancakes) and others are just old school and like normal sliced bread in the morning. I love english muffins and whenever I go to Superstore or Walmart I always go to that hideaway little corner of the store (in the bread or dairy section) and theres always a multi tray on wheels with 75% off bread and stuff they have to get rid of by the end of the night to make way for the next mornings fresh breads. So really its only like 12 hours old. Thats still very fresh bread and Im down with hunting these awesome yummy things down. If Im lucky I may even get my hands on some cinnamon and raison bread/bagels or those expensive but tasty loaves of rye bread - score!
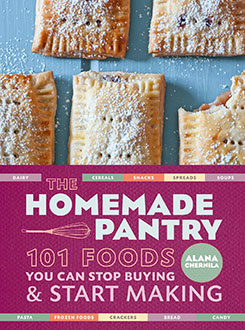
Anyway, since finishing some pretty intense (but fun) temp work Ive been in the mood to do some baking and I kept thinking about english muffins. I have two fantastic cookbooks I love to go back to frequently and they are The New Zealand Bead Book by Alison & Simon Holst and The Homemade Pantry: 101 foods you can stop buying and start making by Alana Chernila.

These books are awesome and I can't recommend them enough. If you don't own them, please amend that serious situation, they're worth it trust me. In case your not from NZ, Alison Holst is kind of like our Martha Stewart (but without the snobbery and fraud conviction haha) and she really only sticks to food and not homemaking stuff in general. Her recipes are delicious, homey and are really easy to follow and her other recipe books are fantastic as well. Id go as far to say I like her stuff more than the Edmonds Cookbook (a must have book in every NZ kitchen).

I knew I got mine right when I ate a couple of my half burnt ones and the texture was the same to what I know. Judge food first with your mouth not your eyes then once you get practiced then you can worry about how pretty it looks.Below is the recipe. Note, I made a few changes as I wanted to make them using whole wheat flour and I suspect my North American oven is a bit different from NZ fisher and paykel ones so I made a few changes re cooking times and temperatures, but overall its pretty much the same. I also followed the 'By Hand Instructions' and doubled the recipe as I don't own a bread hook machine thing, so follow what best suits you.
For 8 English Muffins
25g butter
3/4 cup boiling water
1/2 cup milk
1 Tbsp granulated yeast
2 tsp suagr
2 + 1/2 cups flour (I did 2 cups whole wheat and 1/2 cup of plain white flour. Never do all whole wheat as it will be far too dense)
1 tsp salt
About 1/4 cup of corn meal
1 large mixing bowl (I used our huge glass fruit bowl)
Spatula (silicone works well)
Scales
An apron (unless you want flour on yourself)
Measuring cups
One knife
One small whisk
Dough scraper (very handy, see link so you know what Im talking about)
1-2 cookie/baking trays
Cling film
Cooking spray
Electronic kitchen timer (essential! I bought mine cheaply from Walmart and it works wonderfully)
Bread Machine Instructions
 Measure the butter into the bread machine, pour in the boiling water then leave to stand until the butter has melted before adding the milk, yeast, sugar and flour. Set the machine to to the 'dough' cycle and press 'start'.
 Hand made Instructions
Measure the butter into a large bowl. Pour the boiling water over the butter, then add the the cold milk. Sprinkle in the yeast and sugar and whisk until yeast dissolves. Lease to stand in a warm place for 10 minutes, until the surface bubbles. Add the flour and salt and mix with a knife by continuously cutting into the mixture until it is all combined (good luck using a whisk! haha). Leave to stand in a warm place until that mixture doubles in size (about 30 minutes).
 Shaping and Cooking
 Preset oven to grill/broil and the temperature to 150 degrees C (300 degrees F). Using the knife stir the mixture back to its original size, then on a well floured work surface (with just enough extra flour to work with it without it sticking). Keeping dough very soft, adding as little flour as possible, cut the dough into 8 equal portions and roll into balls. Roll the balls in cornmeal (to stop them from sticking), then place each one on a cookie tray that is wrapped with cling film and sprayed with a bit of cooking oil. Once all balls are on the tray place in a warm spot again to rise for about 15-20 minutes or until they look a bit puffy.
 In a large oven safe fry pan/skillet, carefully place 4 dough balls top side down (do not oil/grease the pan, trust me), and flatten them a tiny amount with a potato masher so that they are kind of flattish on top. Transfer pan to oven and using a timer (very important must have!), cook for 4 minutes. Then using an oven mit, take the pan out, flip them carefully over and cook for another 4 minutes. You may need to repeat this process as the flipping of sides allows for even cooking. Once they look nicely tan on top, transfer to a plate. And repeat the cooking process with the other remaining balls.
My results
As you can see (on the picture to the right) I made a couple of burnt ones. I also made a couple of undercooked ones. Thats because the recipe told me to do it in a dry fry pan on the oven top with odd cooking times. That process was far too slow quite frankly (Im impatient I know!) So I shoved the pan in the oven and they definitely cooked! ie burnt. So I shortened the cooking times and adjusted a few things (and burnt my hand accidentally) and the ones to the left side of the pan are the result and are in my opinion what they should look like. The ones on the right are unflipped ones.
Anyway, I hope this was helpful to anyone who wants to have a crack at this! My husband happily ate the slightly burnt ones with jam and he still kept asking for more so there you go! Everyone is a winner.
Eat them with jam and cream cheese or load em up as a sausage & egg or BLT sandwich. Yum!


